- Forewords
- Strategies
- Balance of Power
- Ballistic Contact
- The Battle Ends
- Torpedo Boats
- Submarines
- MAS
- Regia Aeronautica
- Conclusions
Forewords
Following the strikingly successful attack against the Italian naval base in Taranto, the British Admiralty began planning some shifting of forces around the check board and even the passage of a convoy through the Mediterranean.
Several proposals were forwarded from London to both Alexandria and Gibraltar and , after some compromising, a final decision was reached; the operation which would materialize these changes would be named M.B.9.
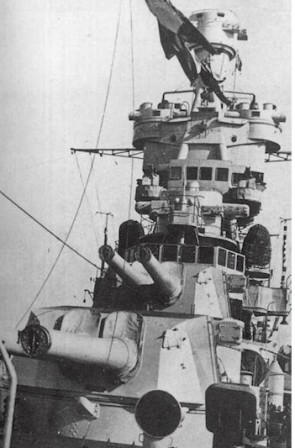
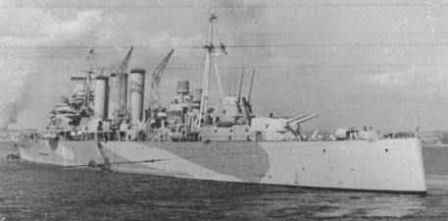
R.N. Trento
Admiral Pond authorized the transferring of the Renown and the Berwick back to England through the Strait of Sicily as part of M.B.9, which called for a complex movement of merchantmen and warships similar to M.B.8.
On November 17th, after the attack on Taranto, the Italian fleet went out to sea with the two remaining battleships, the Vittorio Veneto and the Giulio Cesare. Despite having reached Southern Sardinia first, and then Cape Bon, the Italians were not able to intercept a British force tasked with the delivery of airplanes to the much-depleted Malta-based air forces. The British, despite a claim made to the contrary by Sir. Winston Churchill to the House of Common, had to reevaluate their assumed complete destruction of all Italian battleships during the Taranto attack.
The convoy from Gibraltar (Operation Collar) would be escorted by Force H which included the battle cruiser Renown, the aircraft carrier Ark Royal, the light cruisers Sheffield and Despatch and the destroyers Faulnor, Firedrake, Fury, Forester, Duncan, Wishart, Encounter, Kelvin and Jaguar. Missing from this battle group was the Royal Sovereign still under repair. Force H was under the command of Adm. Sommerville who was very well aware of the threat represented by the Italian Navy.
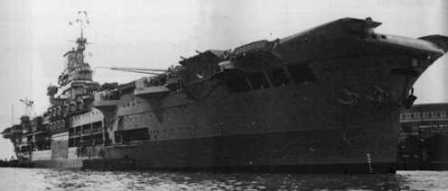
H.M.S. Ark Royal
This fear was very well founded; on the 16th of November, during operation “White”, Sommerville lost several aircrafts to both poor navigation and the presence of the Italian Fleet. After having received notification of the presence of the Italian Navy at sea, Sommerville quickly reversed direction and returned to Gibraltar. Although there was no contact, the presence of the Italian forces achieved its desired effect. Nevertheless, Somerville fear caused the subsequent operation to become more complex, requiring a combined operation of both the Gibraltar and the Alexandria-based fleets.
Strategies
Admiral Campioni had already decided that eventual contact with the enemy would have taken place in conditions not too favorable to the Italians. Sommerville had different issues on hand; his mission was to defend the convoy, but an attack against the incoming Italians would be the only possible way of achieving his goal. At 11:45 Sommerville was informed of the position of the Italian fleet, which at that point was about 50 miles away.
Actions of the Italian torpedo boats and submarines
(Photo USMM)
The British squadron had the Manchester, Sheffield and Southampton in front with the Renown in tail. At around 12:00, time in which Force D was finally sighted, Sommerville’s fears lifted. From a defensive posture, the British suddenly found themselves ready for an offensive action. The 810 Squadron (Swordfish) was launched from the Ark Royal with the task of seeking and destroying the Italian battleships. The battle had begun.
British
At this point Sommerville prepared for battle; the slower Ramilles was left behind, coasting at a speed slightly over 20 knots in a course parallel to the rest of the formation. The Berwick and the Newcastle were ordered to move in with the 18 Cruiser Division under the command of Adm. Holland. Four of the cruisers were armed with 152mm guns, while the Berwick was the only one matching the Italian’s 203mm. During this phase, Sommerville received contradictory reconnaissance reports about the location of the Italian fleet. Sommerville decided to move on. His mission report clearly shows that he thought he had an advantage over the Italians; the sun was behind his ships, the Ark Royal’s plane could have reduced the speed of the enemy (See Matapan) and the Renown and Ramillies could match the two Italian battleships.
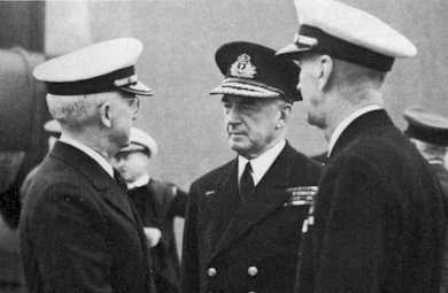
Adm. Pond (center) shown with the US admirals Stark and King
Holland’s cruisers were ready; the Sheffield led the Southampton, Newcastle, Manchester and Berwick. According to battle reports, the last two were slightly further away from the rest of the formation. At 12:07 the Italian fleet was sighted; first the smoke, then the masts and finally the now familiar silhouettes of the Trentos and Zaras. The Renown, steaming at about 27.5 knots 5 miles from Holland’s cruiser,s experienced technical problems with her main shaft and had to reduce speed. Not too far away, the Ramillies and 10 destroyers were already in formation ready to defend against a possible attack from Italian destroyers. The Ark Royal, with her small escort, the destroyers Jaguar and the Kelvin, was instead further south.

A beautiful view of the R.N. Trento
(Photo U.S.M.M.)
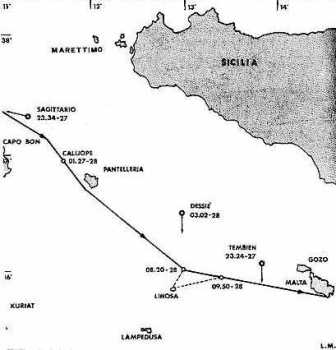
The battle map shows that the various formations were arranged in groups. Two cruisers led the formation, to their south one battleship and 4 destroyers. A few miles back, three more cruisers, 1 battle cruiser and 5 destroyers. Further back, more to the south, the aircraft carrier with her escort and even further south the convoy. The convoy was still being escorted by the two cruisers, Despatch and Coventry, three destroyers (Hotspur, Duncan, Wishart) and the four corvettes.
Italian
After the change of course, which had taken place around 11:45, the Italian fleet was laid out as follows:
1st group (Pola, Fiume and Gorizia) with its escort (9th Squadriglia) 30 miles from Cape Teulada at 206 degrees.
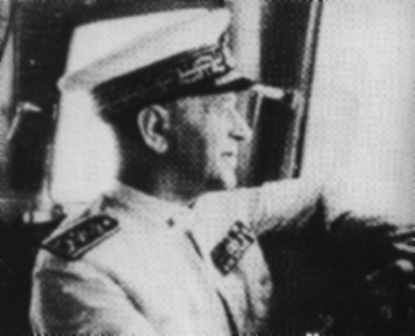
Adm. Inigo Campioni
The other cruisers, Trieste, Trento and Bolzano and the 12th destroyer Squadron were 3 miles from the Pola group at 270 degrees. The battleship group, along with the 13th and 7 th destroyer Squadron, were 12 miles from the Pola at 75.
Balance of Power
The British battleships had five 381mm guns more than the Italians who, on the other hand, could rely on the Cesare’s 320mm. The Italian cruisers, of which most were on the “Washington”, or “heavy” ,” outgunned the British who could, on the other hand, rely on the aircraft of the Ark Royal. In all, the two fleets were balanced and the only possible tilting factor, the Regia Aeronautica, never materialized.
The Italians had a ballistic advantage; their guns could be used up to 30,000 meters (30 km or slightly less than 18 miles ) while the British ones were limited to 24-26,000 meters (24 km or 15 miles. The weight of the largest projectile was similar, 880 Kg for the Italians and 800 Kg for the British. It should be noted that, as reported by Iachino, the British cruisers did not jointly concentrate fire on a single target. According to Sommerville, this was caused by lack of joint training amongst the various units.
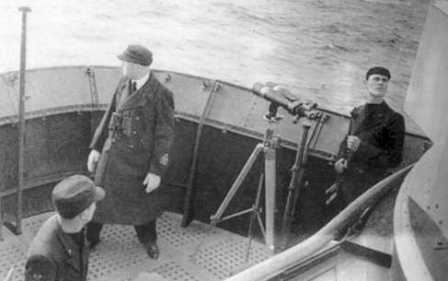
Adm. Iachino
(Photo U.S.M.M.)
The British had the incredible advantage of the Ark Royal. Naturally, knowing the results of the engagement, one might wonder about the true value of this card, but at the time it was enormous. The Italians had not quite recovered from Taranto where a few old biplanes had crippled their fleet. The same planes, though from a different and less trained squadron, were once again in the sky. The Italians could have counteracted using the Regia Aeronautica, although once again the only result were many “holes” in the water.
The chessboard was ready and Campioni made a critical decision; he would not engage. Before leaving Naples he had received precise orders to this effect. He was only authorized to seek battle if conditions were particularly favorable. The two battleships assigned to his battle group were the only available for service; the risk was too high. At 12:07 Campioni ordered the cruisers to change route and converge towards the battleships. The order was too late for Adm. Iachino, who was already maneuvering to engage the enemy. During this phase, while the British commander at sea was free to organize his own forces, Campioni was exchanging radio messages with Rome asking for directions. The organizational difference between the two navies was striking.
This exchange of communications would become a fertile ground for later interpretations. Some historians, among them the much respected Adm. Fioravanzo, cited the communications as a proof of Supermarina’s intent to engage the enemy. As Francesco Mattesini writes, “while Rome thought that Campioni was trying to avoid combat, Iachino was already exchanging salvos.”
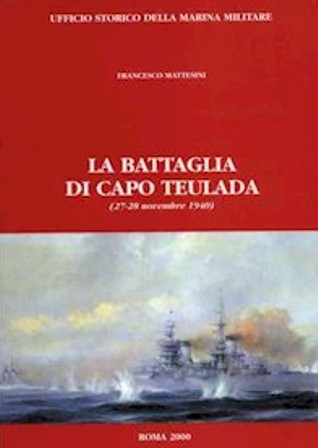
Francesco Mattesini’s
The Battle of Cape Teulada
Ballistic Contact
At 12:22, Adm. Matteucci aboard the cruiser Fiume opened fire against the enemy fleet. Soon after, all the cruisers of the 2nd Squadron opened fire very rapidly using explosive projectiles. According to Italian sources, fire was opened at about 23,500 meters and then the distance between the two formations decreased to 22,000 and , later on, to 14,000.
The Pola and Fiume aimed principally at the heavy Cruiser Berwick. This ship, the Manchester, Sheffield and Newcastle aimed at the cruisers of the 3rd Division, while the Southampton focused on the ones of the 1st division. At 12.24 the Renown entered the frenzy by opening fire against the Trento at a distance of about 23,800 meters; six salvos completely engulfed the Italian cruiser, which, unscathed, made smoke and evaded. It should be noted that due to miscommunication, the Trento (and not the Trieste) was leading the formation, speed was 25 knots and part of the escort was delayed due to a temporary failure aboard the destroyer Lanciere.
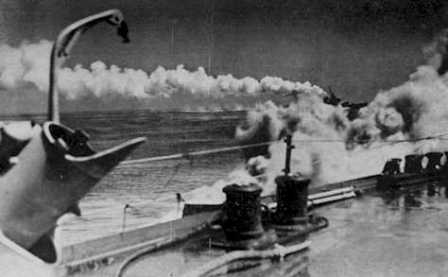
The Italians make smoke to protect the Lanciere
(Photo U.S.M.M.)
The Ramillies opened fire at 12:26, but soon after she was out of range. The Renown was the only heavy gun platform left and targeted mostly the Bolzano. At 12:30 Iachino received orders not to engage! He commanded speed increase to 30 knots while the two battleships would get closer. These five minutes were the most dangerous for the Italian forces; British salvos were getting dangerously close and the evading maneuver clearly exposed them. One more time, the difference between Italian and British gunnery was clearly demonstrated; Italian telemetry was far superior, but Italian salvos were dispersed. British salvos were beautifully grouped, but often “short”.

The Bolzano nearly avoiding a hit
During this exchange the Lanciere was hit several times. The ship was literally devastated by several perfect hits but was able to fire up the boiler and continue moving; later it would be towed back to base. The other destroyers laid a smoke screen, which forced the attacking ship (Manchester) to change target pointing her guns at the Zaras.
The Battle Ends
At this point a French convoy named “F” created great confusion amongst the British ships. When Sansonetti ships laid a smoke screen, two French passenger ships were entering the area. Once the smoke dissipated, the battle cruiser thought that the Italian battleships were entering the scene. Her big guns were quickly aimed at the two ships, but before opening fire Sommerville recognized the two ships which were desperately trying to move away from the combat zone. A single hit from one of the British guns would have been devastating; the ships were fully loaded with French civilians and troops
The situation was critical; Iachino was engaging the enemy, but soon the heavy guns of the Renown could have quickly tilted the balance. Fortunately, at around 13.00 the Italian battleship V. Veneto was finally within range. The V. Veneto fired 19 shots in seven salvos. As soon as the British cruisers (18 Division) realized that the 381 mm guns of the battleship Vittorio Veneto had entered the fray, they quickly withdrew under the protection of the Renown. At this point Sommerville and Campioni both broke contact, Campioni by virtue of the course of his ships, Sommerville by changing course.
In all, the battle had lasted 54 minutes; the cruiser of the 2nd Sq. had fired 666, the Pola 118, Gorizia 123, Fiume 218, Trieste 96, Bolzano 26, Trento 92. For most of its duration, the Italian units were in tactical and numerical minority.
At 12:22 the heavy cruiser Berwick was hit by one of 203mm shots from the Italian cruisers. Turret Y (upper read turret) was hit, seven men killed and the weapon disabled. Her commander, C.V. Guy L. Warren, continued on. At 12.35, the Berwick received another hit, this time in the officer quarters, but there were no victims. The two hits did not diminish the Berwick’s fighting power; as a matter of fact, she was engaged in a ferocious exchange with one of the Polas for the duration of the engagement.
H.M.S. Berwick
In expectation of British activity in the Sicilian Narrow, Supermarina had issued several orders to the local commander C.V. Mario Toscano, who was warned of possible British raids against Sicilian naval bases. The Italian plan did not contemplate the utilization of heavy ships and all offensive activities were organized around torpedo boats and MAS units. Specifically, the 10th Flotilla (Vega, Sirio, Calliope, Sagittario) would leave Trapani and MAS 516, 517, 518, 526, 527 and 528 Augusta, MAS 509, 520, 547 Mazara del Vallo, MAS 530 and 533 Trapani, while a single MAS, unit 531 would be dispatched from Pantelleria. Of all the units ordered to sea, two (MAS 516 and 530) had to return to base due to mechanical failure, while the others reached their assigned position.
Torpedo Boats
The Sagittario (C.C. Eduardo Greppi) was in his assigned patrol area when, at around 23:34 of the 27th, it sighted some vessels believed to be part of the British convoy. A few minutes later, the Sirio (C.C. Giovanni Dessy) confirmed the same sighting. During this phase, the Italian commanders erroneously believed to have been discovered by the enemy and fled. Although the Italian commanders reported a British torpedo attack, British records report that the presence of the small Italian units was never detected.
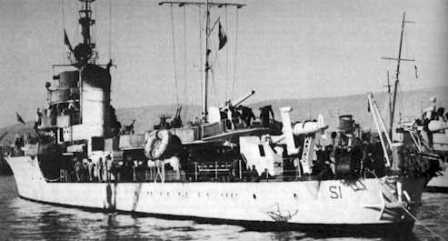
The torpedo boat Sirio
(Photo Whitley)
Similar circumstances followed the sighting by the Vega at 00.28 of the 28th. Once again, the commanding officer (C.C. Giuseppe Fontana) left without attacking. The Calliope, the last unit of the flotilla, received the alert from the Vega and sought contact with the enemy, but her commander, C.C. Ludovico Puleo, decided to desist after the unsuccessful launch of two torpedoes. The explosion of one of these weapons was the only evidence to the British of Italian presence. It is not quite known what caused the explosion since the Italian weapons should not have been equipped with end-of-run fuses.
The behavior of the four Italian torpedo boat commanders was the object of great dissatisfaction within the Naval High command. Correctly, it was assumed that a great opportunity had been given away. There could be several explanations for this failure and they could all be quite plausible; we tend to agree with the local naval commander (Sicilian sector) who wrote, ”A more prompt decision making could have determined a more effective use of the torpedo boats”; An elegant way of saying that the action was not well thought out. It should be noted that throughout the war the effectiveness of the Italian torpedo boats was poor and that an attack would not have guaranteed success. Still, perfectly functioning torpedoes were returned unexpended to base.
The failure of the Calliope was similar to other nocturnal actions conducted by Italian forces. Most probably, these failures were caused by erroneous estimation of the velocity of the target, while distance was usually quite accurate.
Submarines
Two Italian submarines, the Dessiè and Tembien, were in the area of operations between Pantelleria and Malta and conducted independent attacks. T.V. Guido Gozzi of the Tembien fired four torpedoes around 23.34 of the 27th, while T.V. Adriano Prini of the Dessiè launched three at 03.05 of the 28th. None of the weapons found its target and the British ships were never alerted of the danger.
MAS
MAS 526 identified enemy vessels near the southern tip of Malta, but after a quick approach the vessels could no longer be located. The other units returned to base empty-handed. The night was over and so was the threat of Italian insidious weapons. A large number of British forces had been able to force the Sicilian Narrow without a single shot being fired, or a single enemy vessel detected.
Regia Aeronautica
On the 27th of November the Regia Aeronautica conducted a few reconnaissance missions, promptly sighting the British ships, but foul weather conditions did not allow any offensive action. The following day, Italian aerial activity focused mainly on or around Malta where some ships were already at anchor and others were fast approaching.
The various raids, dogfights, bombings, and often alleged downings took place throughout the day. Ultimately, after a day of activity, the Regia Aeronautica did not have much to show for and British forces had been able to safely reach port. The gallantry of both attackers and defenders was noted, and usually inflated Italian claims did not diminish the fact that this had been a superlative British victory.
Conclusions
The New Zealand Star reached Alexandria on the 30th under escort from Force A, while convoy M.W.4 from Malta had arrived a day earlier. Francesco Mattesini, in the official book published by the U.S.M.M. (notes…) titled “La Battaglia di Capo Teulada” (The battle of Cape Teulada) lets Admiral Cunningham conclude the narration of the events by quoting from “A Saylor’s Odyssey”: “A feature of this cruise to the Central Mediterranean, and a most unusual one, was that not a single gun was fired by the Warspite or any of the ships in company with her throughout the whole of seven days at sea”.
Andrew Browne Cunningham
A Sailor’s Odyssey
1951
As the Italian battle fleet was now crippled it was decided to send an important convoy from the United Kingdom right through the Mediterranean with supplies for Malta and Alexandria. As usual, it would be brought to the entrance to the Sicilian Narrows covered by force “H” from Gibraltar, and met by the Mediterranean Fleet off Malta and taken on to its destination.
Of course the Fleet Air Arm got no hits, although they claimed to have done so, and it is obvious that all enemy ships had the legs of Force “H”.
Marc’Antonio Bragadin
The Italian Navy in World War II
1957
Again, the encounter had brought out clearly what the lack of effective and immediate air intervention meant in a naval battle. Although the Italian Fleet was very near the Sardinian airfileds, the British torpedo planes had been able to attack without any Italian fighter opposition.
Angelo Iachino
Tramonto di una grande marina
1959
This time around, the British risked once again to be caught at a disadvantage by our naval forces. Due to our poor long-range reconnaissance and the failure of the interdiction forces in the Sicilian Narrows, once again we could score a success, which would have balanced the misfortune of November 11th (Taranto).
S.W. Roskill
White Ensign – The British Navy at War, 1939-1945
1960
Though the operation had been completely successful, Somerville was criticized in London for not continuing the pursuit of the Italian fleet, and the Admiralty had actually set up a Board of Inquiry at Gibraltar before he returned to that base.
Donald Macyntyre
The Battle for the Mediterranean
1964
Nevertheless, it was undoubtedly air power which had decided the course of events, the presence of the Ark Royal weighing most heavily on Campioni’s mind as he made his decision to retire. The capital ships on the other side again failed to come within range of each other’s guns. Meanwhile, the convoy for Malta had been left undisturbed to reach harbor safely with their precious cargo.
Luis de la Sierra
La guerra naval en el Mediterràneo (1940-1943)
1976
As it usually happens under such circumstances, after the battle of Cape Teulada both navies over evaluated their success. The official British war bulletin announced the torpedoing of a “Littorio” class battleship and the damaging of three cruisers and two destroyers. The Italian media denied, and since the British insisted, Supermarina decided to put an end to the controversy inviting seventeen foreign journalists to the naval bases of Naples and Messina. This was a very unusual maneuver, but a successful one because the BBC eventually gave up.
Arrigo Petacco
Le battaglie navali del mediterraneo nella seconda guerra mondiale
1976
The Battle of Cape Teulada ended with two shots aboard the Lanciere and two more aboard the Berwick. Once back to their bases, both the British and Italian admirals faced very bitter times.
Gianni Rocca
Fucilate gli ammiragli
1987
Even Campioni felt better; he had faced the British fleet a few days after Taranto and now he was seeing it sailing away. The Italian forces were undamaged, and this was what mattered the most.
Bernard Ireland
The War in the Mediterranean 1940-1943
1993
Campioni knew nothing of the convoy, nor of the presence of Ark Royal and force “D”. Assuming himself faced only with force “H”, at less than full strength, he felt justified in seeking a fight, in accordance with the cautious post-Taranto guidelines that had been given to him.
James J. Sadkovich
The Italian Navy in World War II
1994
In Britain Sommerville was almost censured for cowardice, and in Italy a reshuffling of the naval command assuaged Italian disappointment over Campioni’s decision not to engage.
Cunningham’s claim that Sommerville had force the Italian into “full flight” was disingenuous, and Di Sambuy was more accurate to see the action as a tactical victory for the RMI, which had held its own against the British fleet.
Nathan Miller
War at Sea
1995
Upon sighting the battleships, the Italians realized they had lost the opportunity to exploit their earlier superiority, and broke off the action.
Robert Jackson
The Royal Navy in World War II
1997
The enemy force was now in full retreat under cover of a dense smokescreen, and Admiral Somerville, realizing that the engagement had brought him within easy striking distance of enemy bomber bases, decided to break off the chase and return to the vital task of guarding the convoy.
Jack Green and Alessandro Massignani
The Naval War in the Mediterranean 1940-1943
1998
This battle showed that the Italian strategy now required that the Regia Aeronautica keep fighters over the fleet to protect it both from British torpedo planes and reconnaissance aircraft, and this need to provide air cover would give rise to both the proposed conversion of the Acquila to a carrier equipped only with fighters, and mounting catapult-launched fighters on warships.
1st Squadra Navale
Commander at Sea Admiral Inigo Campioni, aboard the Vittorio Veneto
Battleships
Vittorio Veneto C.V. Giuseppe Sparzani
Giulio Cesare C.V. Angelo Varoli Piazza
Destroyers, XIII Squadriglia
Granatiere C.V. Vittorio De Pace
Fuciliere C.F. Alfredo Viglieri
Bersagliere C.F. Candido Bigliardi
Alpino C.F. Giuseppe Marini
Destroyers, VII Squadriglia
Freccia C.F. Amleto Baldo
Saetta C.C. Carlo, Unger de Lowemberg
Dardo C.C. Bruno Salvatori
2nd Squadra Navale
Admiral Angelo lachino, aboard the Pola
Cruiser Pola C.V. Manlio De Pisa
1st Divisione Navale
Admiral Pellegrino Matteucci aboard the Fiume
Cruisers, 1st Divisione
Fiume C.V. Giorgio Giorgis
Gorizia C.V, Giorgio Manfredi
Destroyers, IX Squadriglia
Alfieri C.V. Lorenzo Daretti
Carducci C.F. Alberto Ginocchio
Gioberli C.E M. Aurelio Raggio
Oriani C.F. Ernesto Giuriatia
3rd Divisione Navale
Admiral Luigi Sansonetti aboard the Trieste
Cruisers, 3rd Divisione
Trieste C.V. Umberto Rouselle
Trento C.V. Alberto Parmegiani
Bolzano C.V. Franco Maugeri
Destroyers, XXII Squadriglia
Lanciere C.V. Carmine D’Arienzo
Ascari C.E Sabato Bottiglieri
Carabiniere C.F. Mario Panzoni
Sicilian Narrows
Torpedo Boats, X Flottiglia
Vega C.C. Giuseppe Fontana
Calliope C.C. Ludovico Puleo
Sagittario C.C. Eduardo Greppi
Sirio C.C. Giovanni Dessy
Submarines
Alagi C.C. Stefano Nurra
Aradam C.C. Giuseppe Bianchini
Axurn C.C. Emilio Gariazzo
Diaspro T.V. Marino Salvatori
Dessiè T.V. Adriano Prini
Tembien T.V. Guido Gozzi
Mameli C.C. Giovanni Cantù
MAS
516
517
518
526
527
528
509
520
530
531
Force H
Vice Admiral Sir James Sommerville aboard the battlecruiser Renown
Force B (Gibraltar)
Battlecruiser
Renown
Aircraft Carrier
Ark Royal
800′ Squadron 12 Skuas.
808′ Squadron 12 Fulmar
810′ Squadron 12 Swordfish
818′ Squadron 9 Swordfish
820′ Squadron 9 Swordfish
Cruisers
Sheffiled
Despatch
Destroyers
Faulknor
Firedrake
Fury
Forester
Duncan
Wishart
Encounter
Kelvin
Jaguar
Force F (Gibraltar)
Admiral LE. Holland ccommander of the 18th Cruiser Division aboard the Manchester
Cruisers
Manchester
Southamptom
Destroyers
Hotspur
Corvettes
Peony
Salvia
Gloxinia
Hyancinty
Merchantman
Caln Forbes
Clan Fraser
New Zealand Star
Mediterranean Fleet
Admiral Sir Andrew Cunningham, aboard the Warspite
FORCE A (Alexandria)
Battleship
Warspite
Aircraft Carrier
Illustrious
806′ Squadron 12 Fulmar
815′ Squadron 10 Swordfish
819′ Squadron 9 Swordfish
830′ Squadron 12 Swordfish
Cruisers (3rd Division)
York
Gloucester
Glasgow
Destroyers
9 units
FORCE C (Alexandria)
Admiral H.D. Pridham-Wippell, aboard the Orion
Battleship
Malaya
Ramillies
Aircraft Carrier
Eagle
813 Squadron 9 Swordfìsh
6 Gladiator
824′ Squadron 9 Swordfish
Cruisers of the 7th Division
Orion
Berwick
Sydney
Ajax
Destroyers
8 Units
FORCE D (Alexandria)
Cruisers
Calcutta
Coventry
Destroyers
4 Units
Merchantman
Breconshire
Memnon
Clan Ferguson
Clan Macaulay
Italian Air Force
| Sardegna |
| Unit | Base | Aircraft | tot & avail. | Commander |
| Aeronautica della Sardegna | ||||
| 8 Stormo B.T | Alghero | S.79 | ||
| 27 Gruppo | Alghero | S.79 | 13 – 11 | |
| 28 Gruppo | Decimomannu | S.79 | 16 – 11 | |
| 32 Stormo B.T | Decimomannu | S.79 | ||
| 38 Gruppo | Decimomannu | S.79 | 17 – 11 | |
| 89 Gruppo | Decirnomannu | S.79 | 16 – 14 | |
| 93 Gruppo B.M. | Cagliari Elmas | Cant Z.506 | 10 – 4 | |
| 3 Gruppo ACT | Monserrato | CR.32 | 18 – 13 | |
| CR.42 | 8 – 8 | |||
| 155 Sq. CT | Alghero | CR.42 | 8 – 8 | |
| Aviazione Ausiliaria R.M. della Sardegna | ||||
| 85 Gruppo R.M | Elmas | Cant Z.501 | 21 – 14 | |
| 5 Sezione R.M | Olbia | Cant Z.506 | 5 – 2 | |
| Cant Z.501 | 2 – 2 | |||
| Sicily |
| Unit | Base | Aircraft | tot & avail. | Commander |
| 2 Squadra aerea (Sicilia) Palermo | ||||
| 11 Brigata Castelvetrano | ||||
| 30 Stormo BM Gela | ||||
| 87 Gruppo | Gela | S.79 | 15 – 13 | |
| 90 Gruppo | Gela | S.79 | 14 – 9 | |
| 3a Divisione Catania | ||||
| 34 Stormo Catania | ||||
| 52 Gruppo | Catania | S.79 | 15 – 10 | |
| 53 Gruppo | Gerbini | S.79 | 14 – 12 | |
| 37 Gruppo B.a T | Comiso | Ju.87 | 14 – 14 | |
| Comando Caccia della Sicilia Comiso | ||||
| 1 Stormo C.T. Trapani | ||||
| 6 Gruppo | Catania | Mc.200 | 33 – 23 | |
| CR.32 | 1 – 1 | |||
| 17 Gruppo | Palermo | Mc.200 | 28 – 22 | |
| CR.42 | 8 – 6 | |||
| CR.32 | 4 – 4 | |||
| 23 Gruppo A.C.T. | Comiso | CR.42 | 27 – 27 | |
| Sez C.T. Reggio Calabria | ||||
| Aviazione Ausiliaria della Regia Marina della Sicilia Augusta | ||||
| 83` Gruppo R.M. | Augusta | Cant Z.501 | 16 – 9 | |
| Cant Z.506 | 7 – 1 | |||
| 139 Squadrone R.M. | Stagnone | Cant Z.501 | 6 – 5 | |
| 189 Squadrone R.M. | Siracusa | Cant Z.501 | 7 – 4 | |
British Air Force
| Unit | Base | Aircraft | tot & avail. | Commander |
| Royal Air Force | ||||
| 148 Squadron | Luqa | Wellington | 16+4 | Maj.P.S. Foss |
| 431 Flight | Luqa | Maryland | 5 | Cap. E.W. Witeley |
| 261 Squadro | Luqa | Hurricane | 16+4 | Maj. D.W. Balden |
| Takali | Gladiator | 4 | ||
| Fleet Air Arm | ||||
| 830 Squadron | Hal Far | Swordfish | 12 | Cap. Corv. F.D. Howie |